Introduction #
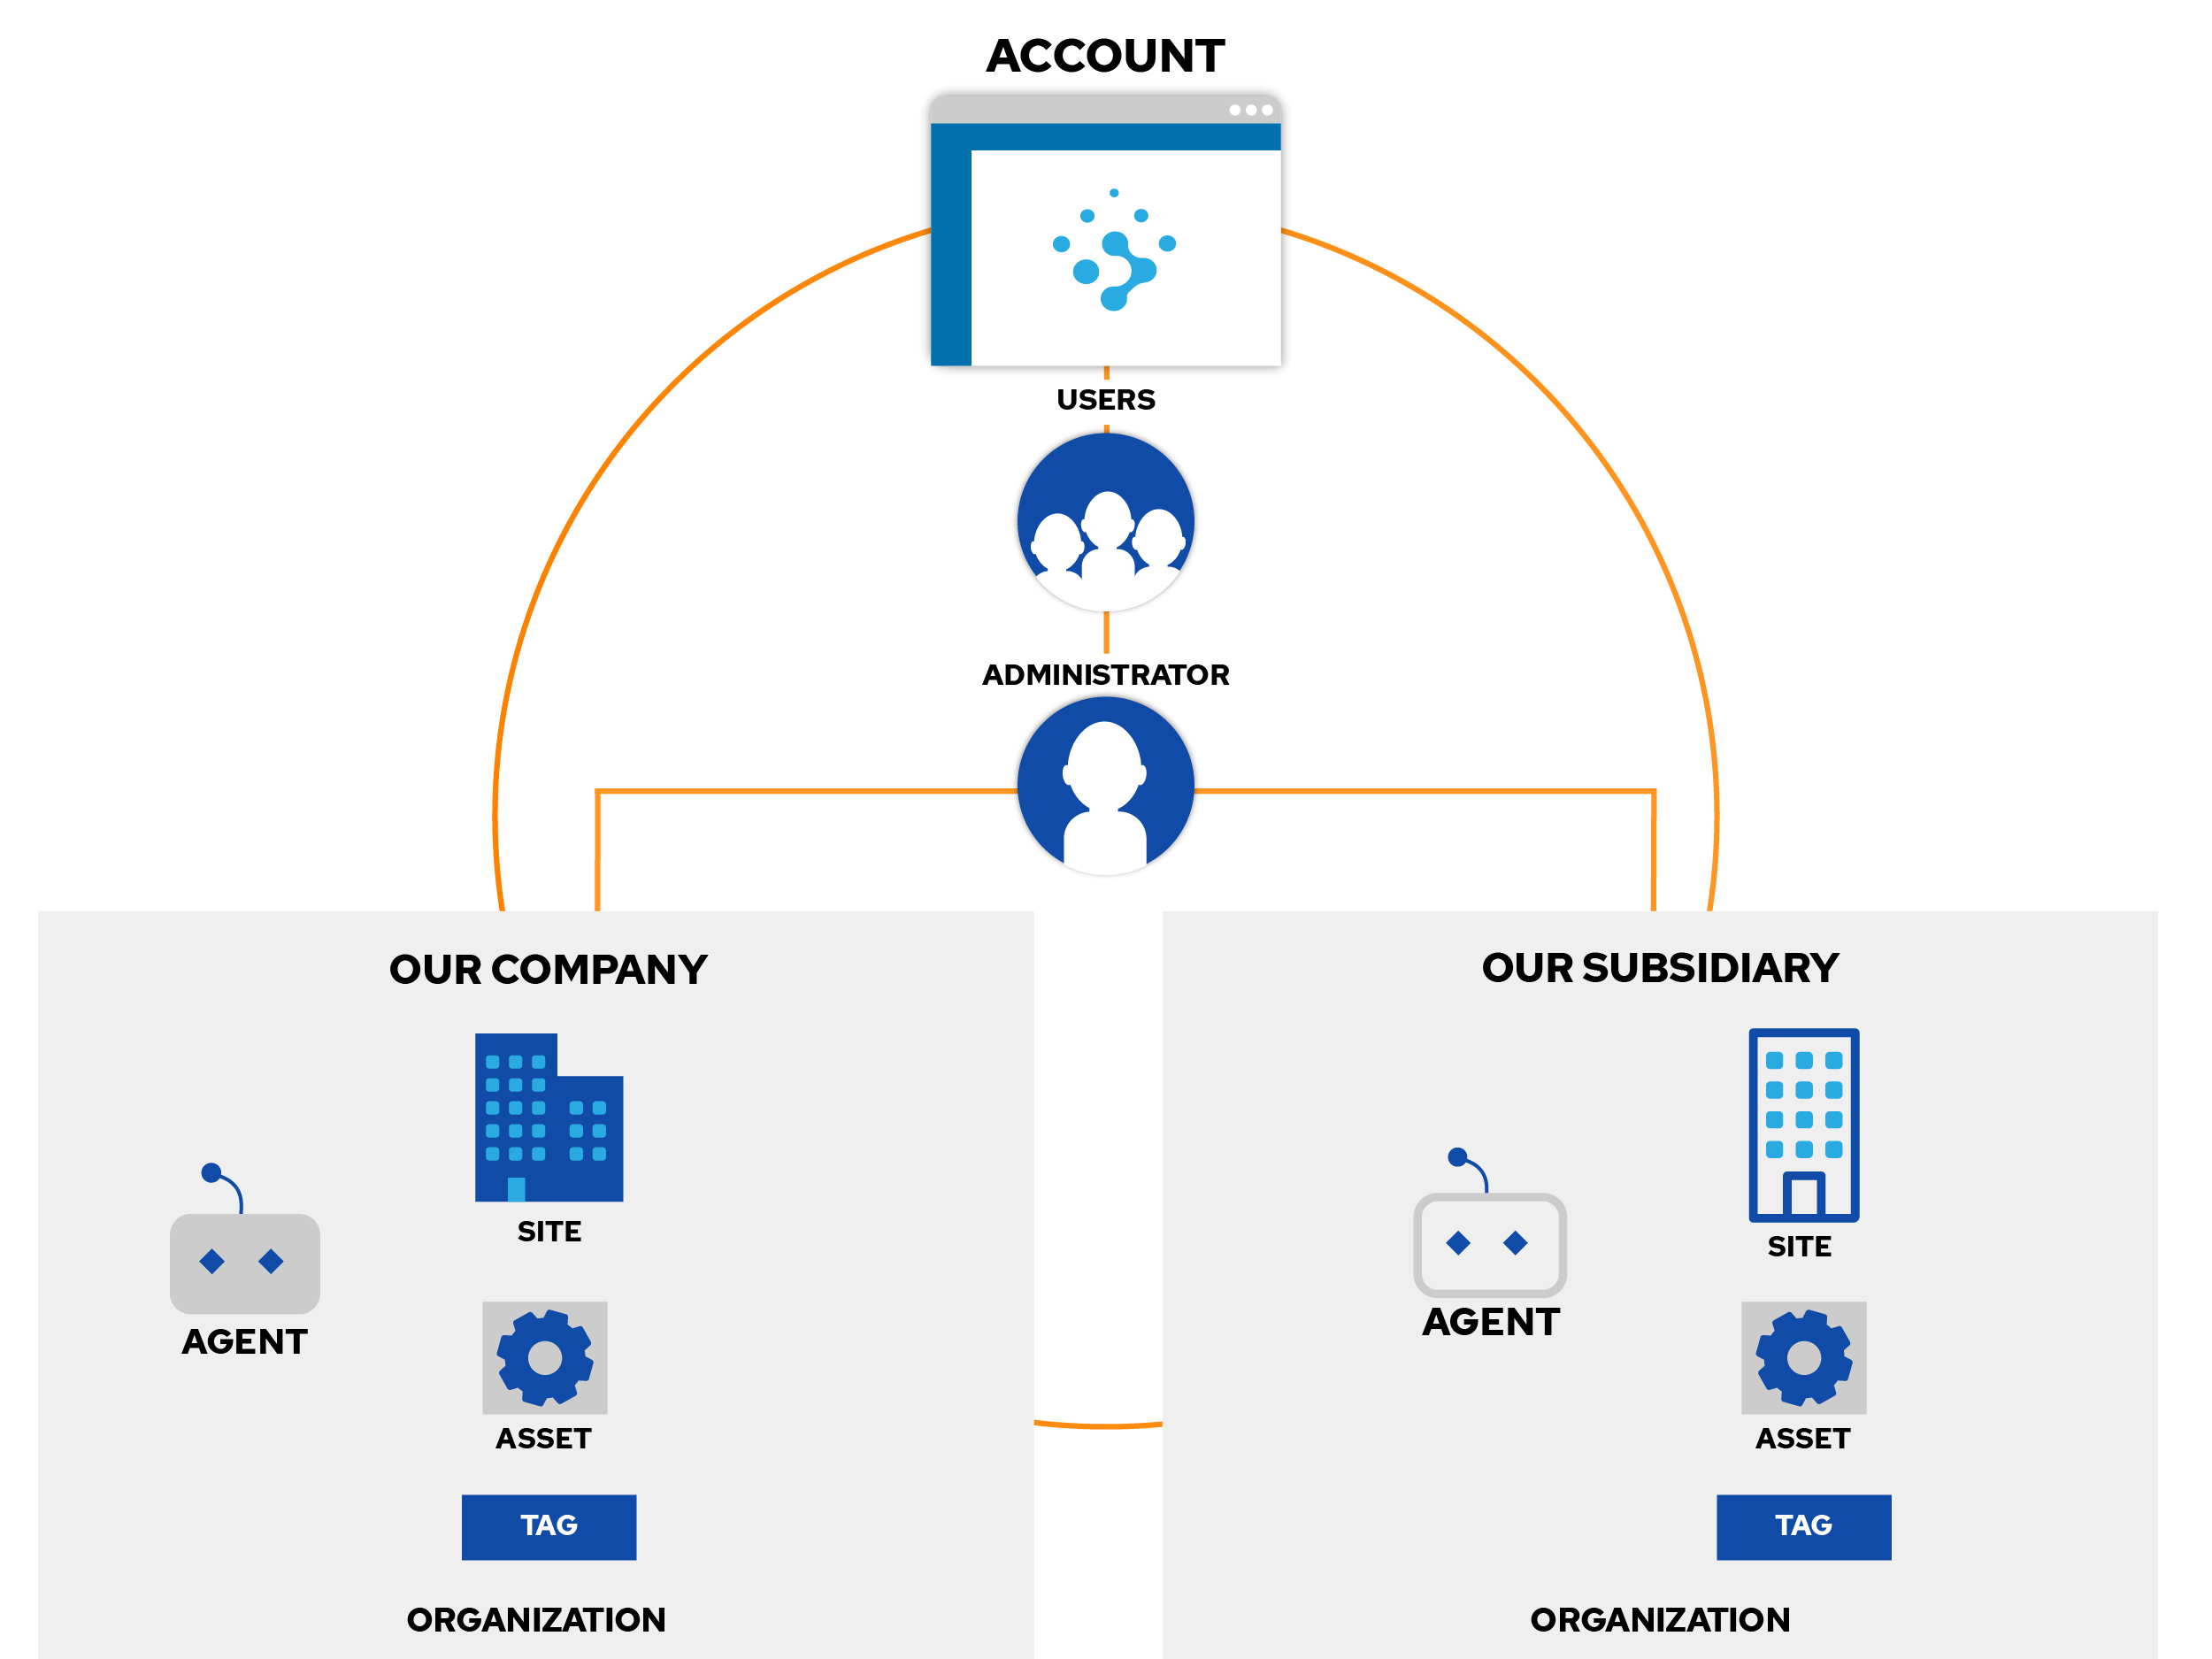
Rumble helps you quickly identify all your assets but organizing those assets can get tricky in large environments. In this edition of Tips & Tricks, we will look at how Rumble manages data and how you can organize this data using Organizations, Sites, and Tags. The image to the right highlights the general data model for Rumble.
The key things to note:
- Accounts have Organizations and Users
- Organizations have Sites and Explorers
- Sites have Assets & Tasks
- Assets have Tags
Leveraging Organizations #
Every Rumble account includes unlimited Users, Sites, and Explorers. The Professional and Enterprise tiers include unlimited Organizations. Users are associated with your top-level account and can be restricted to one or more organizations. If you manage multiple subsidiaries or provide consulting services, creating a new organization for each entity is the cleanest way to separate your data. Every organization has a separate data retention policy and is associated with its own Explorers, Sites, and Alert settings. You can change your active organization using the drop-down on the upper right side of the console.
In addition to keeping disparate entities separate, temporary organizations are helpful when running spot scans for specific protocols or testing different scanner settings without impacting your normal inventory. For example, if you want to find Microsoft DNS servers quickly, creating a temporary organization, installing an explorer, and then running a scan for just the DNS services is a quick way to get those results. Temporary organizations can have their data purged automatically through short data retention settings or be deleted outright when you are done with them.
Managing Sites #
At the next level down are Sites. Organizations support unlimited sites and each site is a unique view of the entire IP address space. Many folks use sites to segment inventories between physical locations, but they can be used for more than that. Sites can be used for one-off scans, for temporary test labs, and everything else in between. If multiple locations use the same RFC1918 IP space internally, you may want to drag the site column to the left side of the Inventory table when navigating this view.
Explorers & Scans #
Explorers are tied to organizations but can also be associated with a specific site. Explorers can be moved between organizations using the Reassign action in the Explorer details page. Every individual scan is associated with a site and an explorer. For environments where you want to compare the network visibility from multiple perspectives, running a scan from multiple explorers, each tied to a different site, can provide that view. Keep in mind that the raw scan data can be downloaded from the task details page and re-imported into a different site or organization as needed. Importing historical scans is a fast way to see a snapshot of the network at a given time.
Tags #
At the asset level, Tags can be used to assign ownership, apply labels, and generally manage your inventory. Tags can be specified as a single label (production) or as a key-value pair, such as "group=production". Tags are an excellent way to flag assets for further investigation and track responsibility. The inventory and Export API both support tag-based filtering of results.
Summary #
In this edition of Tips & Tricks we described Rumble's data model, which starts with your account, flows into organizations, is split into sites, and can then be managed via tags. If you have any questions about this model or how you can automate this process, please reach out to our team.
Thanks for using Rumble and happy scanning!
